
............ creative experimentation
Friday 23 August 2013
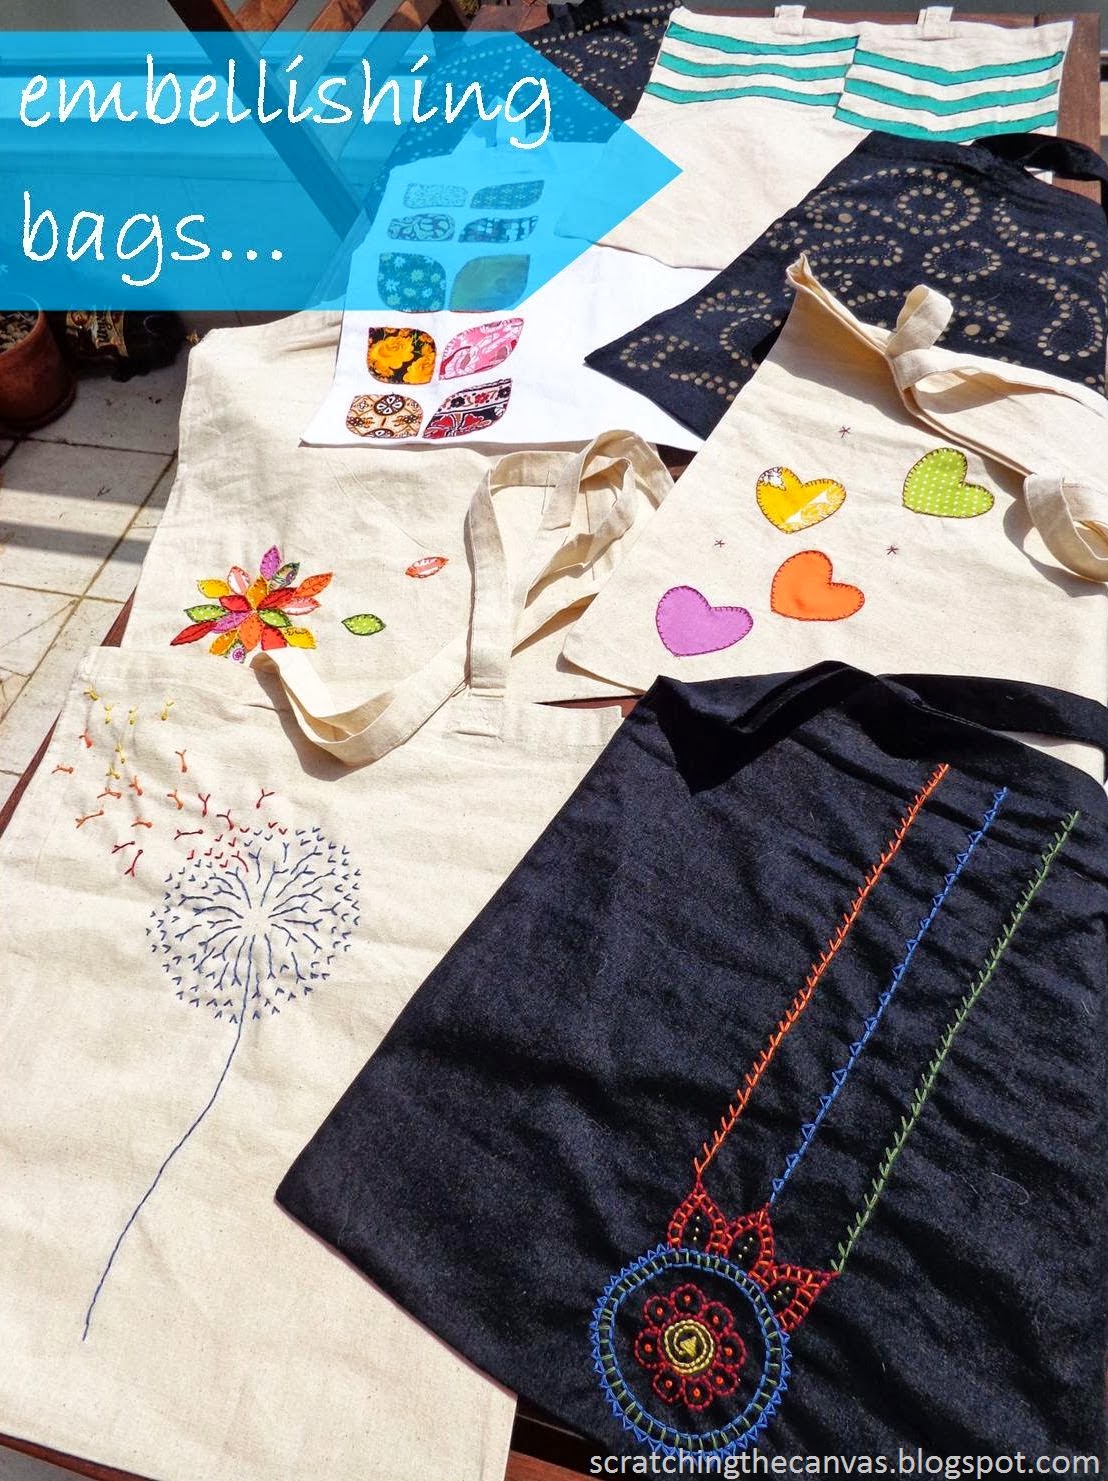
Excess baggage
I still have some of these cotton shopping bags left to stitch / embroider/ bleach / applique / decorate in new ways, but I'm pretty happy with the results so far. Looking forward to flying home tomorrow and getting some feedback when I give them out as gifts :)

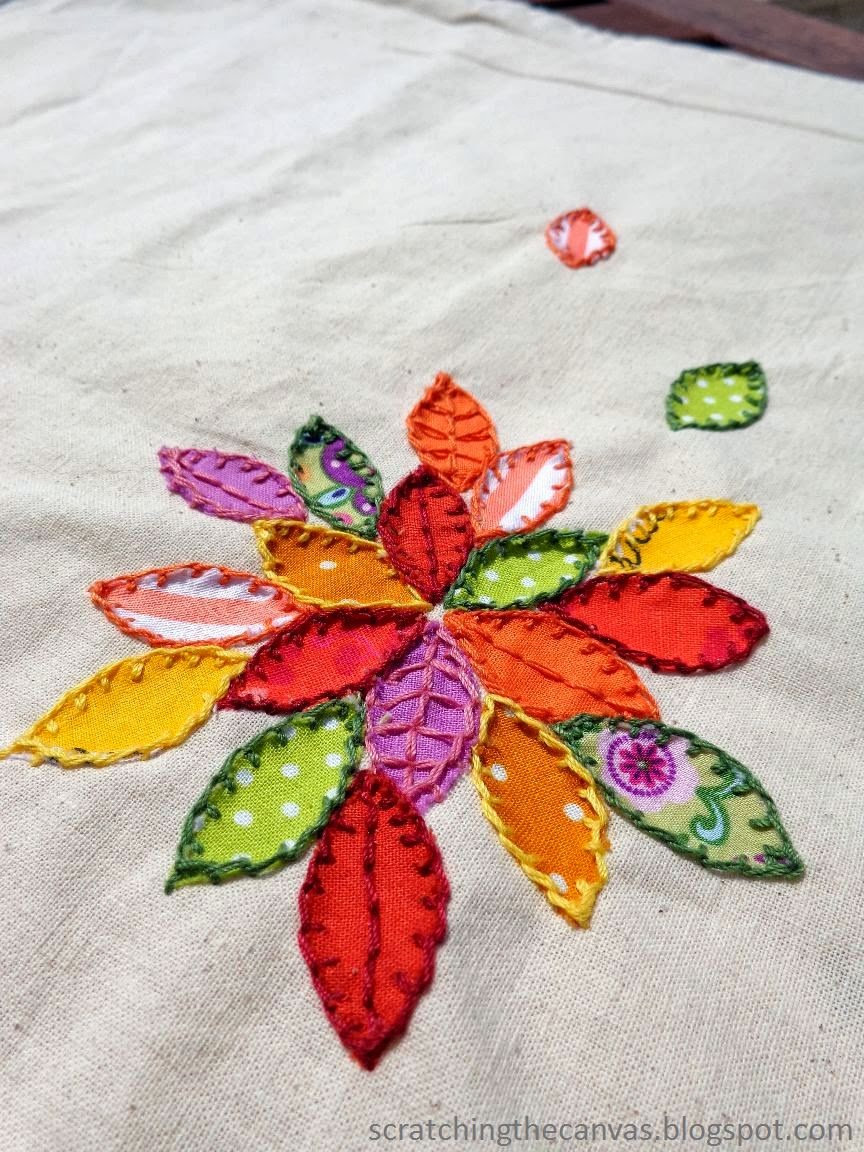
Floral applique
For my final birthday present I went back to applique, and stitched this flower design onto the bag. I really love the colours in these fabrics.


Tuesday 20 August 2013
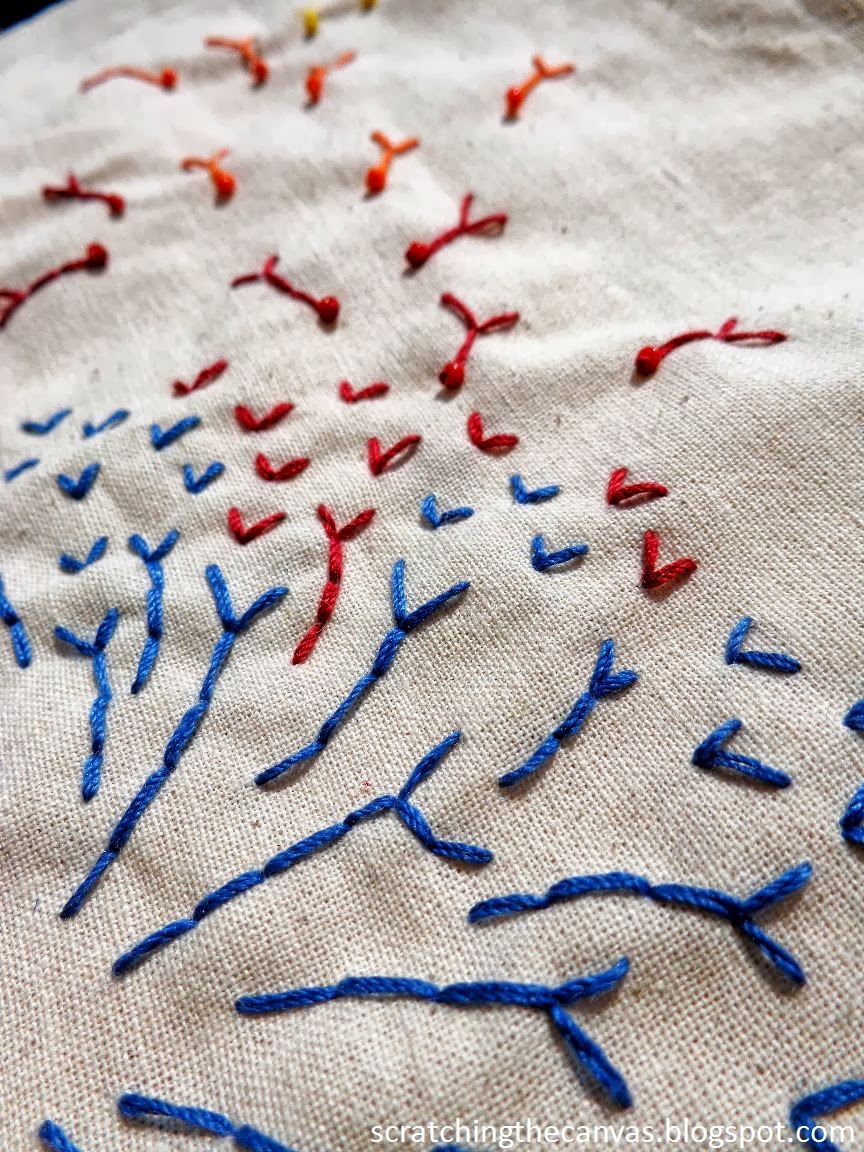
Dandelion design
Birthday present bag no.2 - today I tried a slightly more simple stitch design! I really like the bead detail.


Monday 19 August 2013
Stitching gifts
Having tried my hand at applique and bleaching cotton shopping bags, I wanted to have a go at stitching my own designs to make bags for a couple of birthday presents.

This is my first go, and as usual I threw myself in with a bit of an ambitious design. I think I've done it justice, but it took me AGES. And the cat chasing the cotton didn't help. Anyway I'm pretty pleased with the end result, and keen to try another one tomorrow.


This is my first go, and as usual I threw myself in with a bit of an ambitious design. I think I've done it justice, but it took me AGES. And the cat chasing the cotton didn't help. Anyway I'm pretty pleased with the end result, and keen to try another one tomorrow.

Friday 16 August 2013
Bleach Bags
I have a selection of plain cotton shopping bags that I bought to decorate, but I've had trouble using the black ones. Applique and stitching has been effective for the cream and white bags, but the black ones haven't worked so well, so I decided to try bleaching them.
I used cream cleaner which contained bleach. I didn't know if this would work as well as the toilet bleach I've seen in other tutorials, as I assume the bleach content is weaker and it's a less absorbant substance because of the chalky texture. In fact, this worked perfectly and had extra benefits over straight bleach - the smell is milder and the fabric doesn't have any odour when finished, and the bleach is absorbed, leaving the chalky substance on the surface of the fabric, meaning I can see very clearly where I have already marked it. The fabric only needs a quick rinse under the tap afterwards and it's ready to use.
To start, I collected:
- my fabric: pure cotton shopping bag - this canvas-like fabric worked perfectly
- my bleach: I used Cif 'White Ultra' cream cleaner with bleach
- a small container for the bleach: I used a burned-out tea light foil, as I only wanted a tiny container to keep my spillage risk to a minimum
- a small wooden board: or equivalent, to place between the front and back of the bag to stop the bleach going through to the back
- my painting tools: cotton buds (q-tips) for big dots, and a propelling pencil for tiny dots.
- optional protective glove or something to put between your decorating hand and the bag, in case of leaning on the bleach pattern: I didn't have any problems, but if you have sensitive skin you might consider this.
Step 1 - paint your design onto the bag.

Step 2 - leave to dry for 5 mins or so, until the white surface substance is flakey. In this picture you can see my test area, where I painted a smaller area and rinsed it to check the bleach was working.

Step 3 - rince thoroughly by hand (with gloves).The pattern will become clearer as it dries.
Recommend not putting on the floor to photograph, as any nearby cat will immediately sit on it.

Have fun!

Thursday 25 July 2013
Rainbow Tree
If there was one thing I really wanted to achieve while teaching at this summer school, it was getting something on the wall that the children could say was theirs. The school had recently moved locations, so the art room was bare (both in things on the wall and in supplies). To inspire the kids I showed them a picture of a wonderful display I spotted on Pinterest here, of a tree design covered with coloured circles decorated by the children in the school.
C.jpg)
Of course my kids didn't want to colour in circles, they wanted to colour in rabbits and dolphins and flowers - so be it. We also discussed colour mixing, so we looked at using different shades of the same colour on a circle, and hopefully having this on the wall will give them a reference when they're trying to remember their colour wheel. Nothing like as good as the original, but not bad for our little Bulgarian summer school.
C.jpg)
C.jpg)
Of course my kids didn't want to colour in circles, they wanted to colour in rabbits and dolphins and flowers - so be it. We also discussed colour mixing, so we looked at using different shades of the same colour on a circle, and hopefully having this on the wall will give them a reference when they're trying to remember their colour wheel. Nothing like as good as the original, but not bad for our little Bulgarian summer school.
C.jpg)
Monday 22 July 2013
Robots in disguise
During summer school I've mostly struggled to find things that will keep young boys occupied for more that 5 minutes. Having had a chat with my partner's mum, who raised two boys, I went in newly inspired with a collection of household junk and a couple I made earlier, and we made robots.
This. Was. Brilliant. Not only did they ALL want a robot (even the girls, they made princess robots - of course), they all asked nicely for help and worked on them for 30 minutes - 1 hour without getting bored and trying to climb of the window. Then they played with them in the playground after class. Magic.
C.jpg)
Thursday 18 July 2013
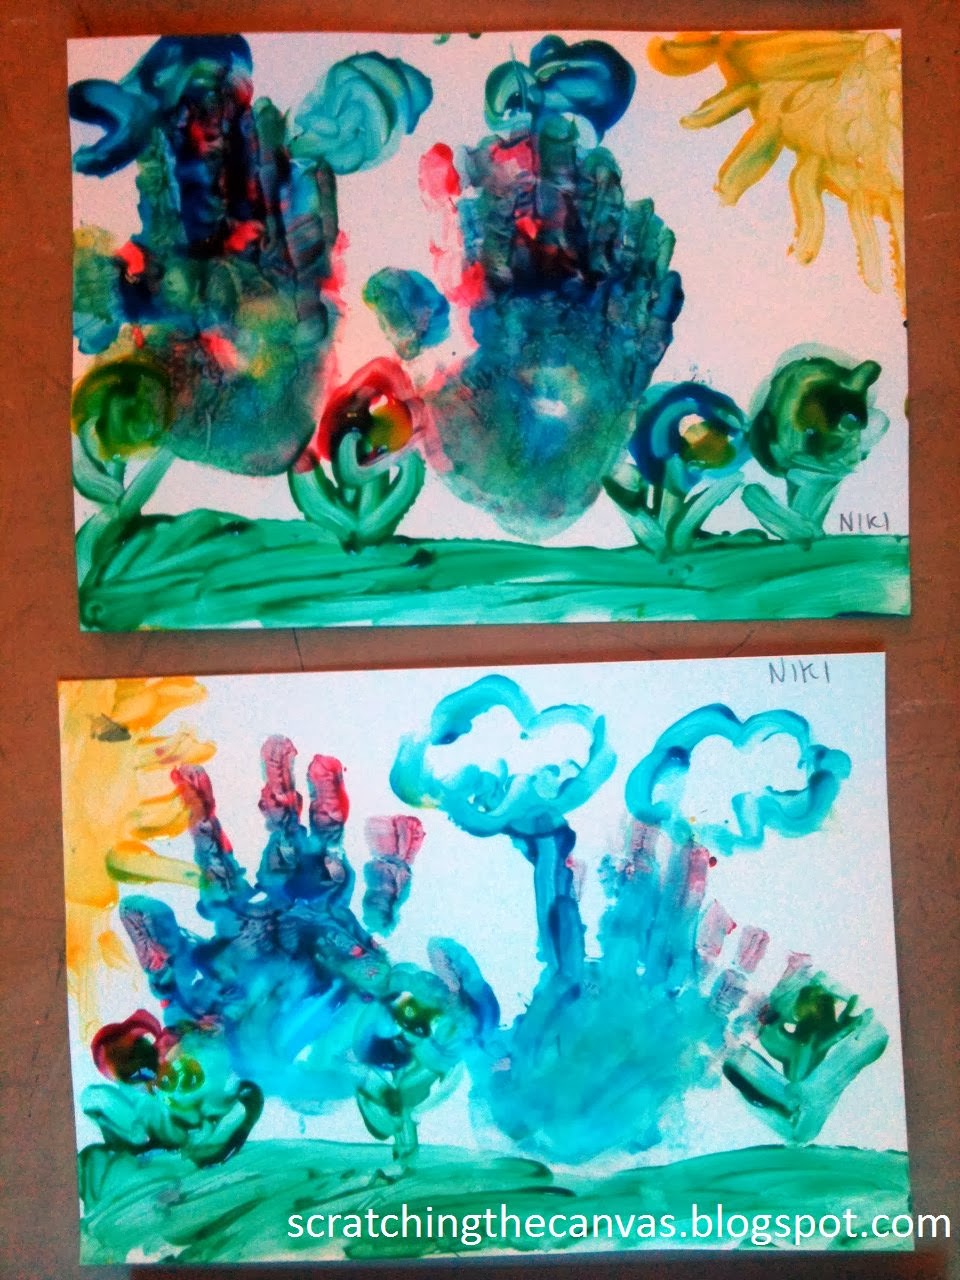
Can't go wrong with finger painting
You really can't go wrong with finger painting with young children. My little summer school kids giggled and squirmed when I told them to put their hands in the paint. Brilliant fun, and some were really creative too!
Monday 15 July 2013
Colour mixing with kids
Over the next few weeks I will be teaching art and crafts at a summer school here in Bulgaria. The groups are mixed ages and abilities (in both art and speaking English), and fairly rebellious, so it will be a challenge to find activities that suit everyone.
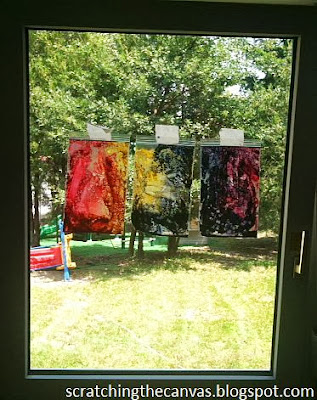
One of the best things I've tried is the no-mess painting idea that I've seen recommended for very young children. Actually, this didn't hold the attention of my baby class, but the older kids (aged 10ish) really enjoyed it. I think this was because we could discuss the principles of colour mixing at the same time, something only a few knew much about. We looked at an image of a rainbow, and then I put two primary colours each in clear freezer bags and asked the children to guess which colour they would make when mixed. Then they tried it out, and we organised them in the window in rainbow order. Hopefully they will now remember how to make each secondary colour. And brown of course, when mixing paints on paper we also made a lot of brown.

One of the best things I've tried is the no-mess painting idea that I've seen recommended for very young children. Actually, this didn't hold the attention of my baby class, but the older kids (aged 10ish) really enjoyed it. I think this was because we could discuss the principles of colour mixing at the same time, something only a few knew much about. We looked at an image of a rainbow, and then I put two primary colours each in clear freezer bags and asked the children to guess which colour they would make when mixed. Then they tried it out, and we organised them in the window in rainbow order. Hopefully they will now remember how to make each secondary colour. And brown of course, when mixing paints on paper we also made a lot of brown.
Wednesday 10 July 2013
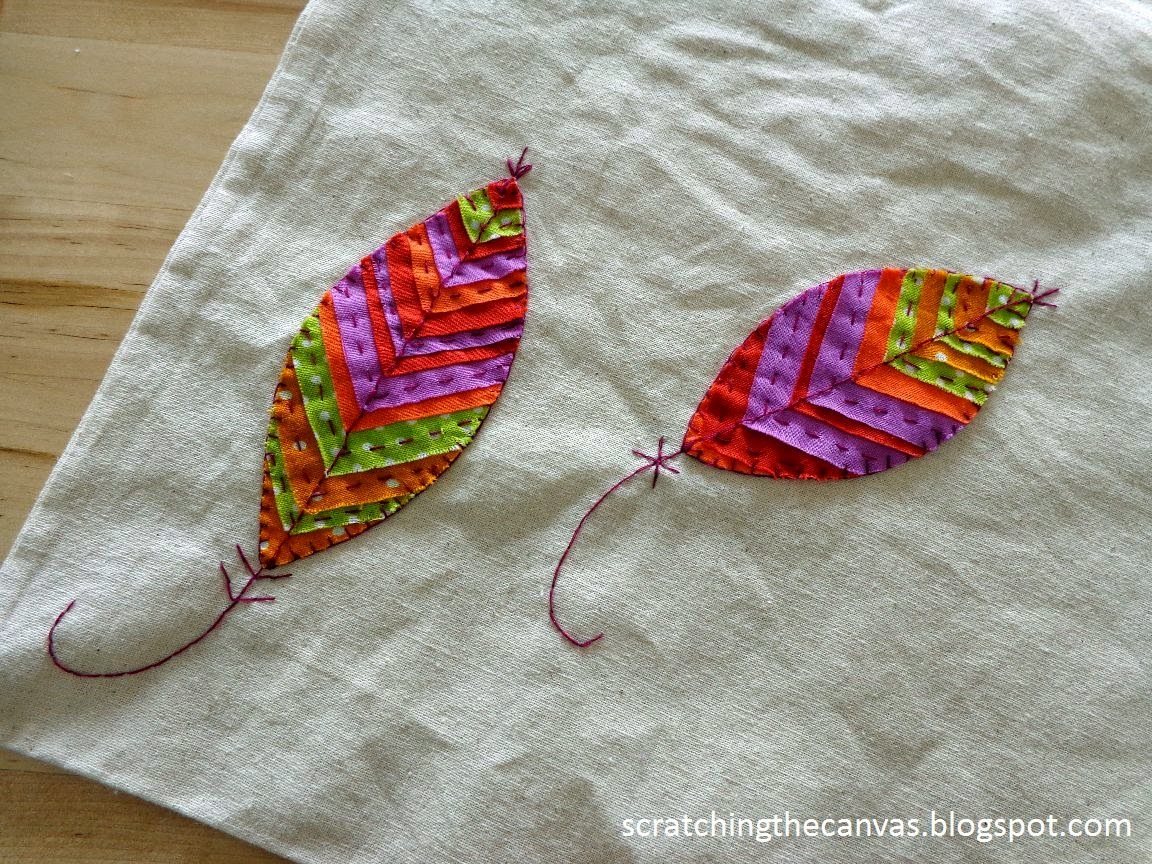
Feather appliqué
I'm really pleased with how my current project, decorating canvas bags, is turning out. Think I might have to keep this one!


Friday 5 July 2013
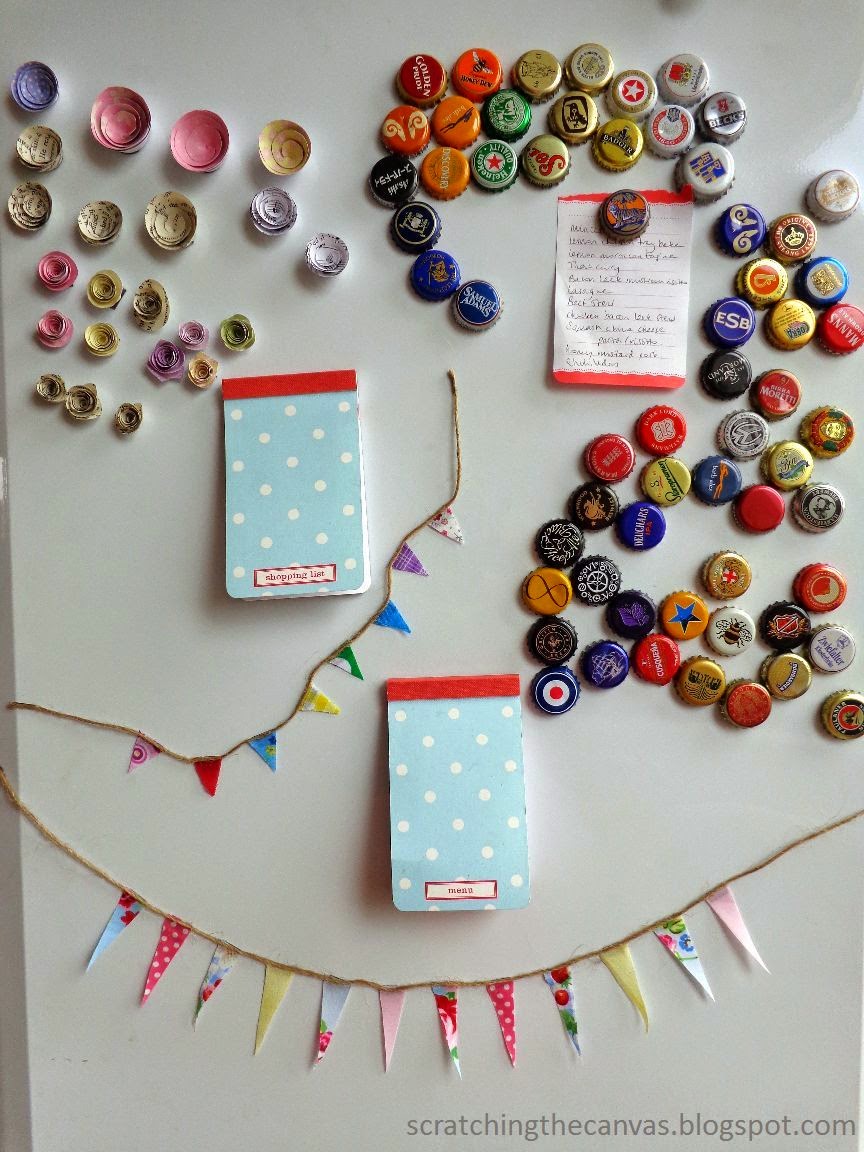
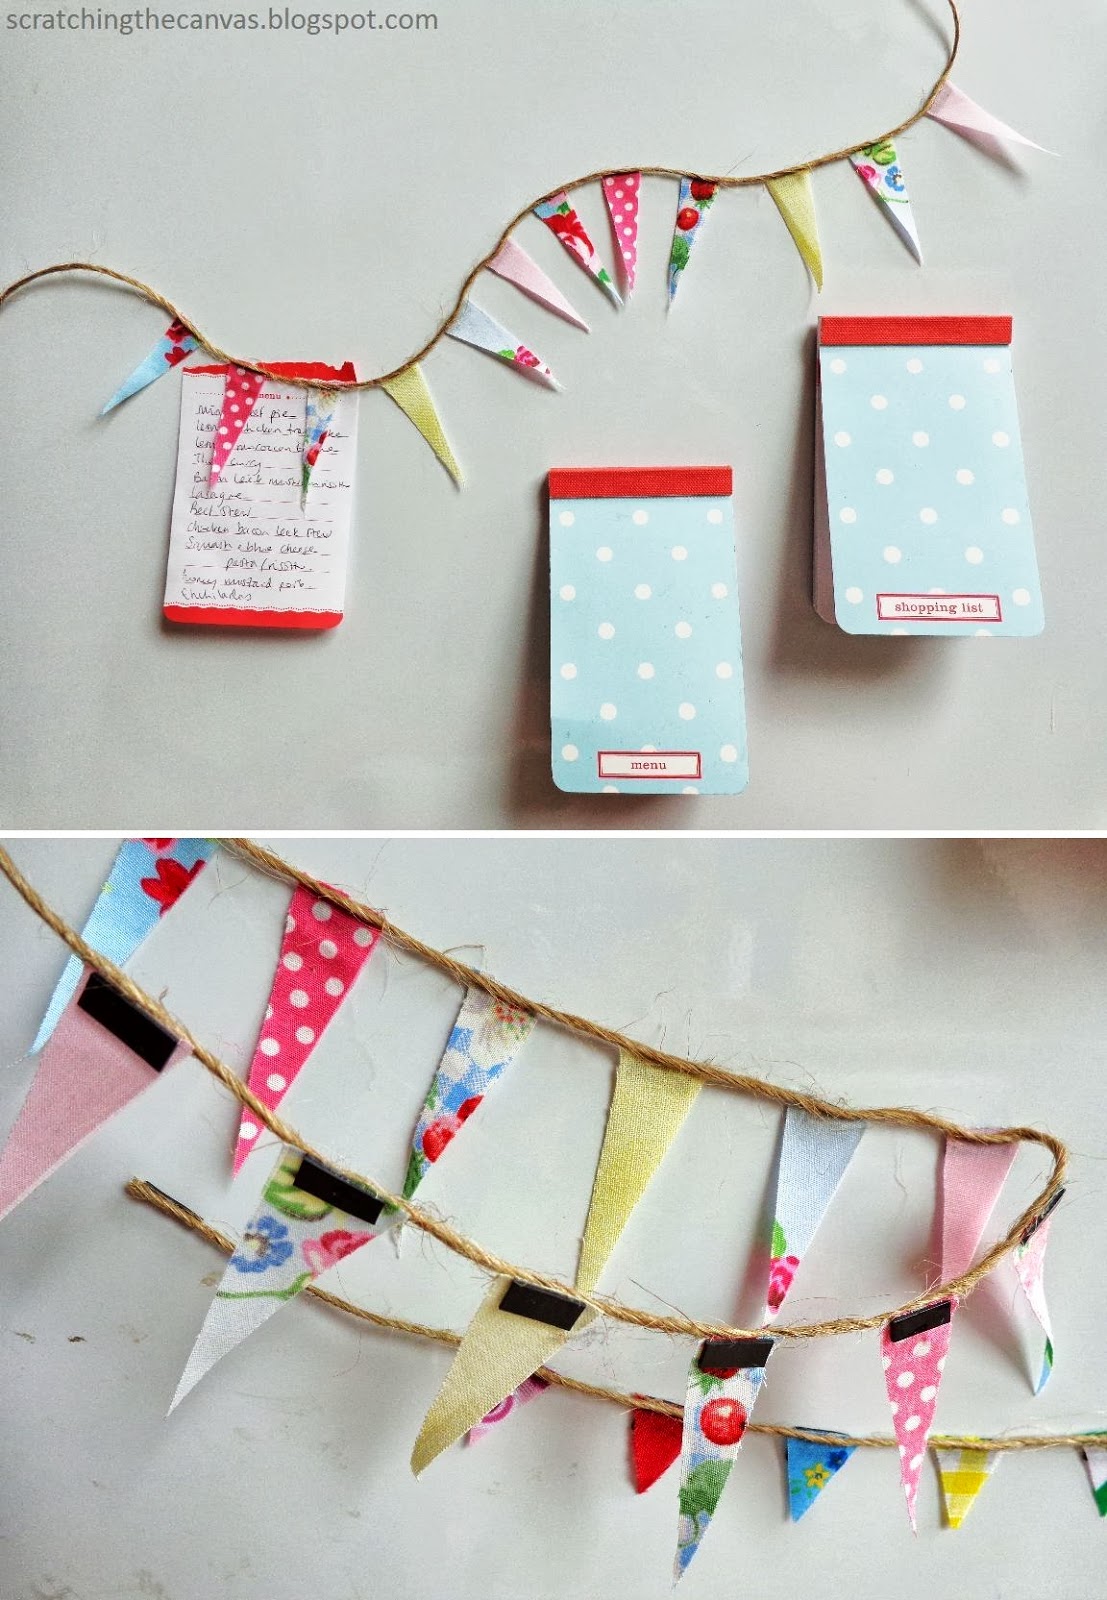
Magnetic bunting
I bought some really nice fabrics to make proper bunting last year, and I've not really done much with the scraps. Having made some fridge magnets recently I thought I'd try making some tiny bunting for the fridge. This is how it turned out (I have a crowded fridge..):
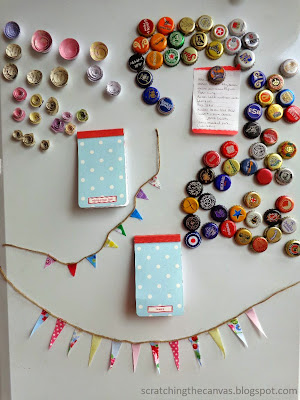
The bunting was really easy to make. I just used PVA to glue little magnets, cut from a craft magnet-roll, onto the back of each fabric triangle. The magnet is self-adhesive, but it's not sticky enough so I used the glue as well. Then I glued twine to the front, and also stuck a magnet to each end of the twine.

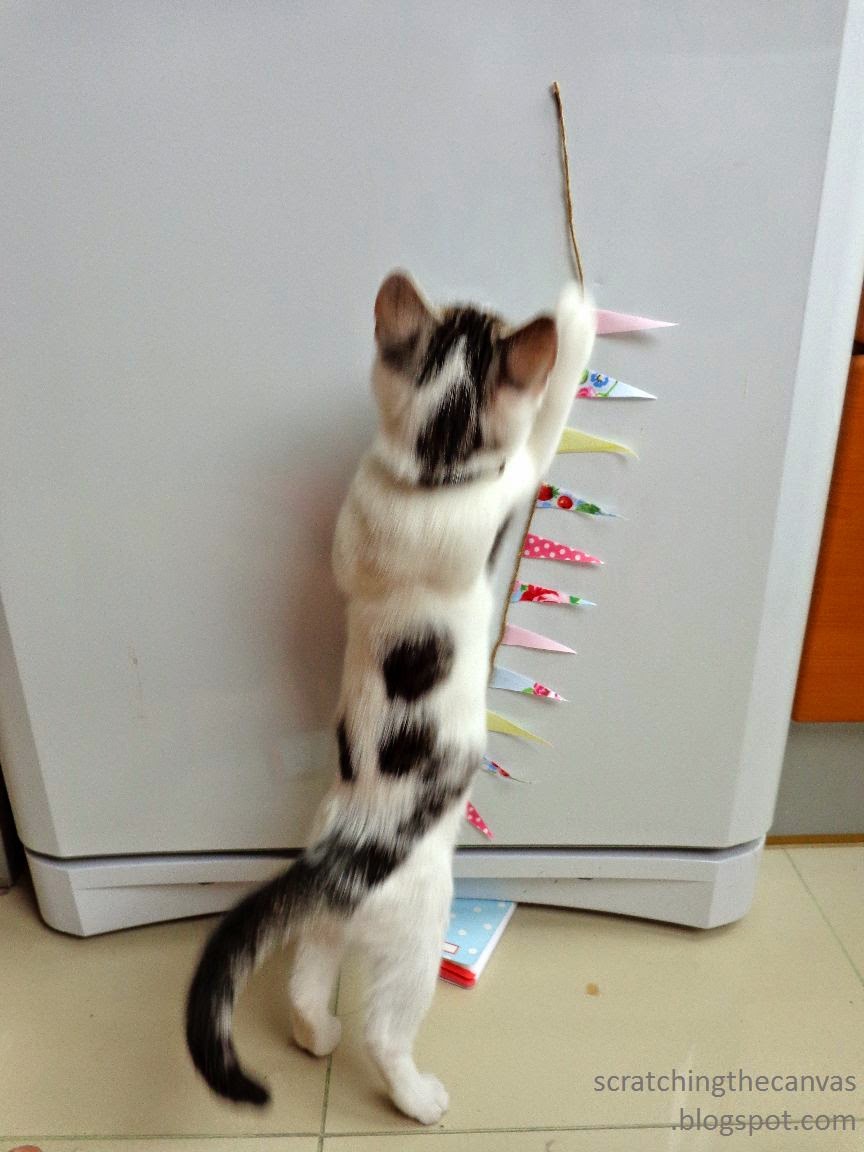
The cat particularly liked this project. Think I'll have to keep the bunting on the top part of the fridge...

The bunting was really easy to make. I just used PVA to glue little magnets, cut from a craft magnet-roll, onto the back of each fabric triangle. The magnet is self-adhesive, but it's not sticky enough so I used the glue as well. Then I glued twine to the front, and also stuck a magnet to each end of the twine.
The cat particularly liked this project. Think I'll have to keep the bunting on the top part of the fridge...
Sunday 30 June 2013
Teacup collage
Being British and living abroad, I have become quite attached to things that remind me of home. I'm also far more aware of all the iconic things about my home that foreigners see as 'British'. Anything to do with tea is definitely on the list...

Today, inspired by a gorgeous artwork by Teresa Sheeley, I made this hanging teacup collage.


Today, inspired by a gorgeous artwork by Teresa Sheeley, I made this hanging teacup collage.


Thursday 27 June 2013
Paperchain wreaths
This is one of the easiest things I've tried recently. Cut strips of paper, fold into heart shapes, staple. The small ones would look good on a Christmas tree too.


Peg wreath attempt no.1
Had a go at making my own clothes peg wreath yesterday with some lovely paper I bought and an old wire coat hanger. This is the result:

One thing I would recommend if you're doing a rainbow effect like this is to cover your frame in blank pegs first to see how many fit around it. Then make sure they divide between an equal number of different papers to make sure your colours match up when you've gone all the way round.
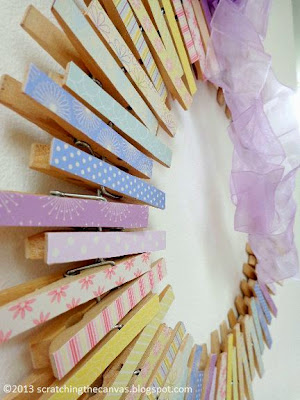

One thing I would recommend if you're doing a rainbow effect like this is to cover your frame in blank pegs first to see how many fit around it. Then make sure they divide between an equal number of different papers to make sure your colours match up when you've gone all the way round.

Wednesday 26 June 2013
Hanging paper flowers. Or jelly fish?
Yesterday I had a go at making some hanging flower decorations. They are supposed to be inspired by fuschias, but ended up looking a bit like jelly fish, especially from a distance, so could be a fun childrens-room project too I guess!


Crepe paper flowers 2
A slightly less fiddly way of making the flowers in my last post (here).

Make the paper/wire bud as described before. Overlap the petals in a row along thin double sided tape, and then wrap around the bud. This took less time and fewer petals to create each flower than when sticking them on individually.

Make the paper/wire bud as described before. Overlap the petals in a row along thin double sided tape, and then wrap around the bud. This took less time and fewer petals to create each flower than when sticking them on individually.

Monday 24 June 2013
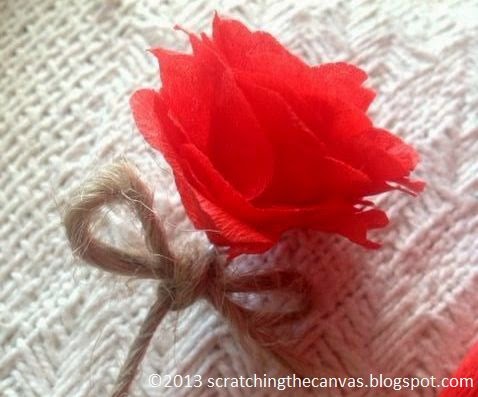
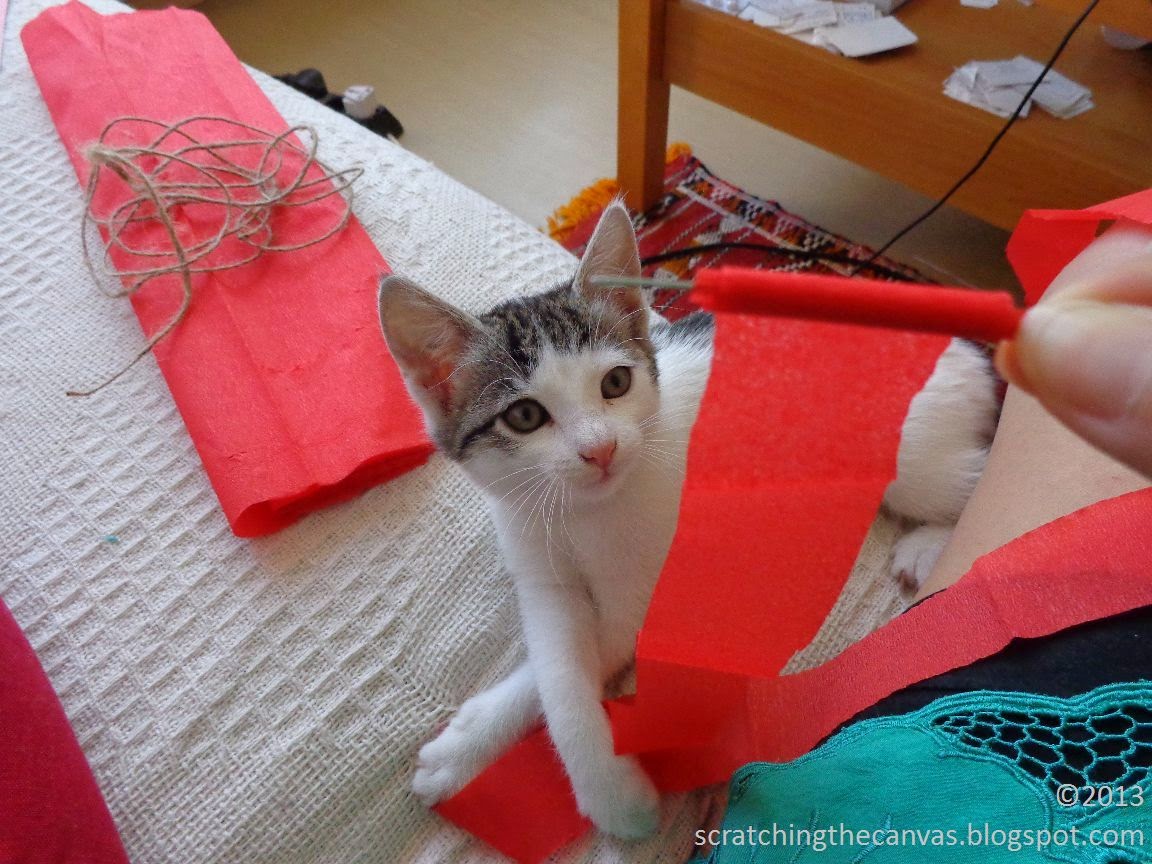
Crepe paper flowers
Today I tried out a tutorial for paper flowers I've seen on Pinterest. I tried to find the original web link to post here, but I can't, so my take on it will have to do.


This particular project was made all the more fun by the presence of our new kitten, who is quite taken with craft activities herself - though more in a destructive than creative way! She may become a regular blog feature.

What I did:


This particular project was made all the more fun by the presence of our new kitten, who is quite taken with craft activities herself - though more in a destructive than creative way! She may become a regular blog feature.
Sunday 23 June 2013
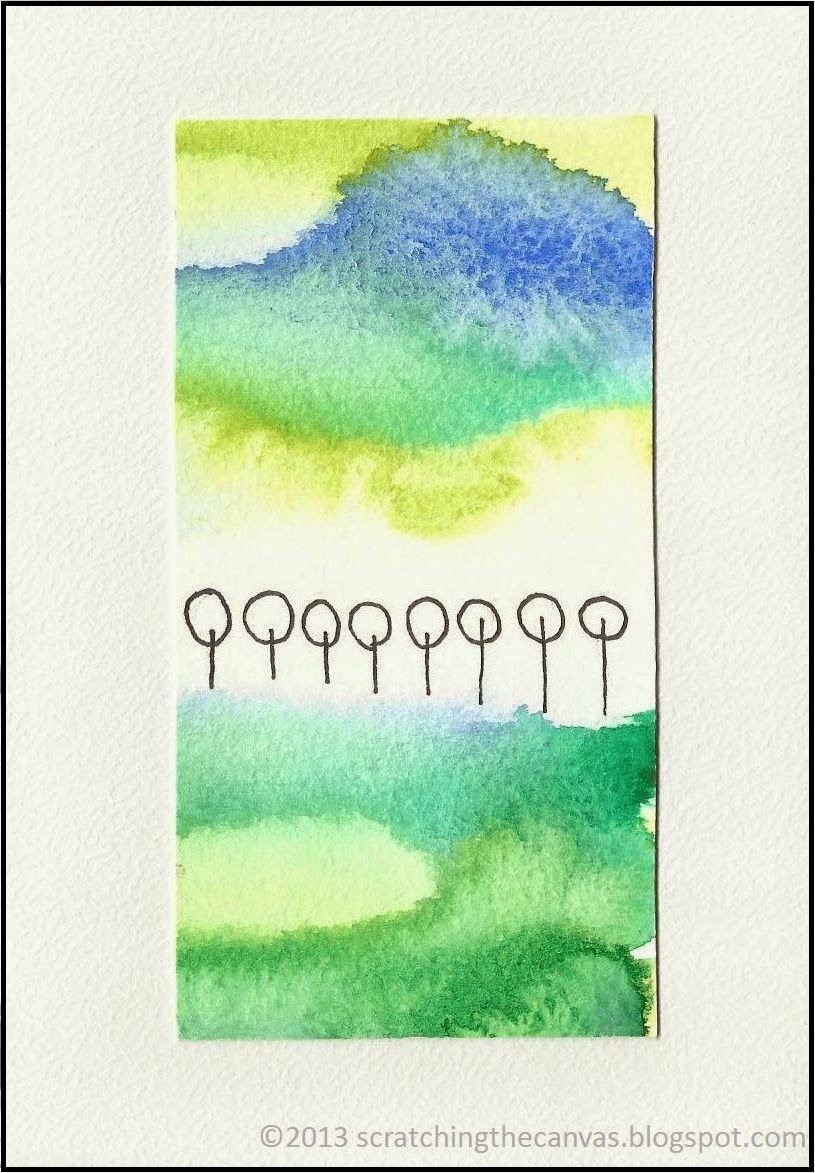
Watercolour Blues
Recently I made some new greetings cards.

I painted out a few different pages washed with greens and blues, and when I cut up the green coloured pages they reminded me a little of England's rolling hills and threatening skies, so I drew on some tree shapes and developed a new selection of painted cards called 'trees'.


I painted out a few different pages washed with greens and blues, and when I cut up the green coloured pages they reminded me a little of England's rolling hills and threatening skies, so I drew on some tree shapes and developed a new selection of painted cards called 'trees'.
Monday 17 June 2013
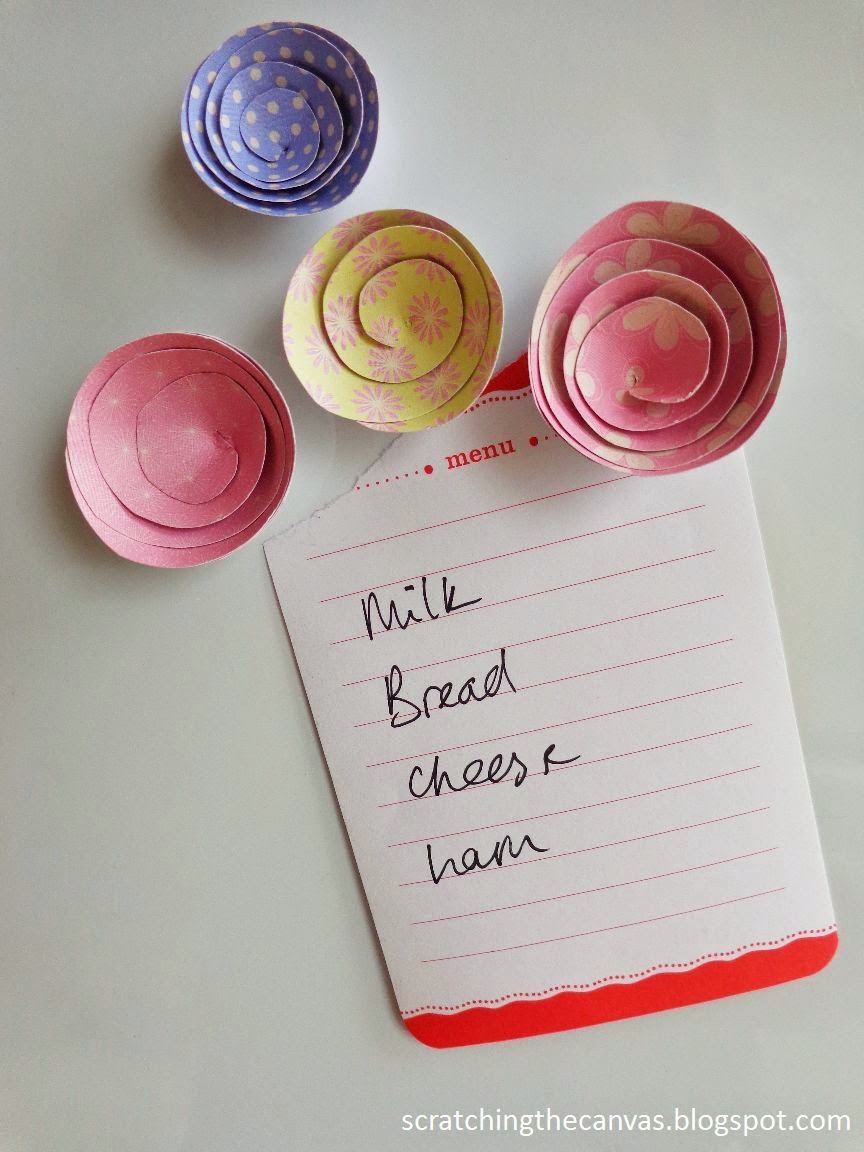
Paper flowers wall art
Having seen a few examples of this idea I gave it a go using an old artist's catalogue. Having a portfolio full of thick, glossy paper and bright colours worked better than a magazine.
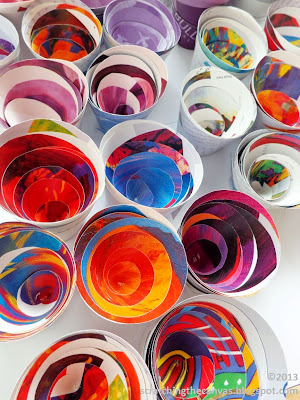
I cut each page into a rough circle and then cut a spiral into the centre, the spiral width getting thinner as I went. Starting at the centre I then wrapped the spiral around itself and used double sided tape to tape the end closed. Then I arranged on card and glued in place. Looks great on my bedroom wall.


I cut each page into a rough circle and then cut a spiral into the centre, the spiral width getting thinner as I went. Starting at the centre I then wrapped the spiral around itself and used double sided tape to tape the end closed. Then I arranged on card and glued in place. Looks great on my bedroom wall.

Saturday 15 June 2013
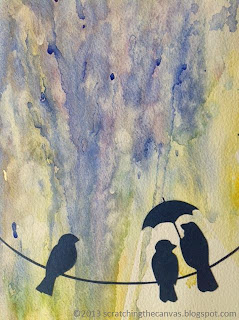
Watercolour rain
I've seen a few things like this on Pinterest recently - block silhouettes under drippy paint. This is my first attempt. I used watercolours on a sheet of heavy watercolour paper, and paper-cut shapes.

Friday 14 June 2013
Little paper butterflies
I bought these die-cut butterflies from an Ebay seller called lesliepilot, who claims to have developed her prints over years. With 100 pieces in a pack at only 99p these are great for numerous crafts. I also cut/tore my own additional butterflies from old book-pages.

The obvious thing to do is layer the different sizes, so my first results look like this. Good for hanging decorations or gift wrap accessories.
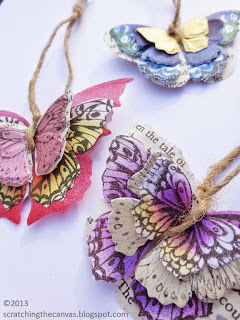

The obvious thing to do is layer the different sizes, so my first results look like this. Good for hanging decorations or gift wrap accessories.

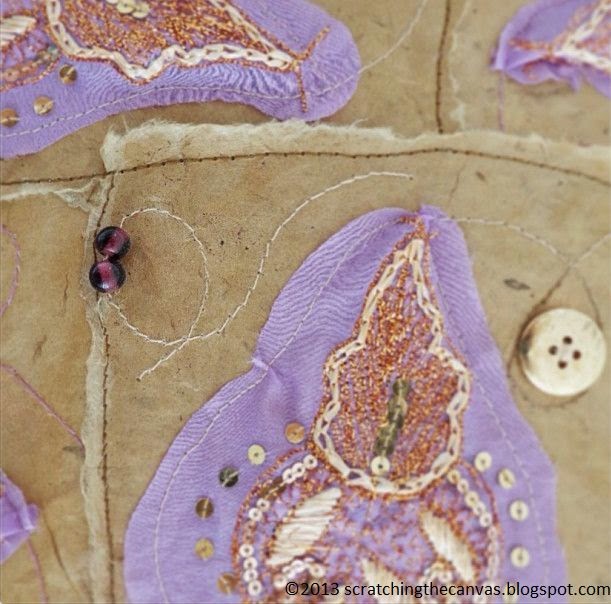
Fabric and paper wall art
I recently found some fabric that I've had since high school. We had a scraps bin in the art studio that we could rummage in for school projects, and I couldn't part with this particular vibrant sequined piece that I found.
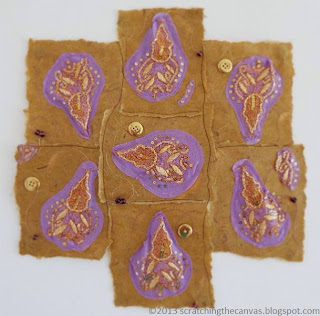
Ten years later I decided it wasn't doing any good sitting in a box, so I tested my newly aquired sewing machine and patched it on to some heavy handmade paper and decorated with beads and buttons.


Ten years later I decided it wasn't doing any good sitting in a box, so I tested my newly aquired sewing machine and patched it on to some heavy handmade paper and decorated with beads and buttons.
Thursday 13 June 2013
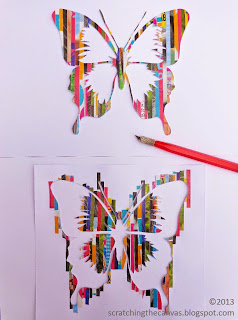
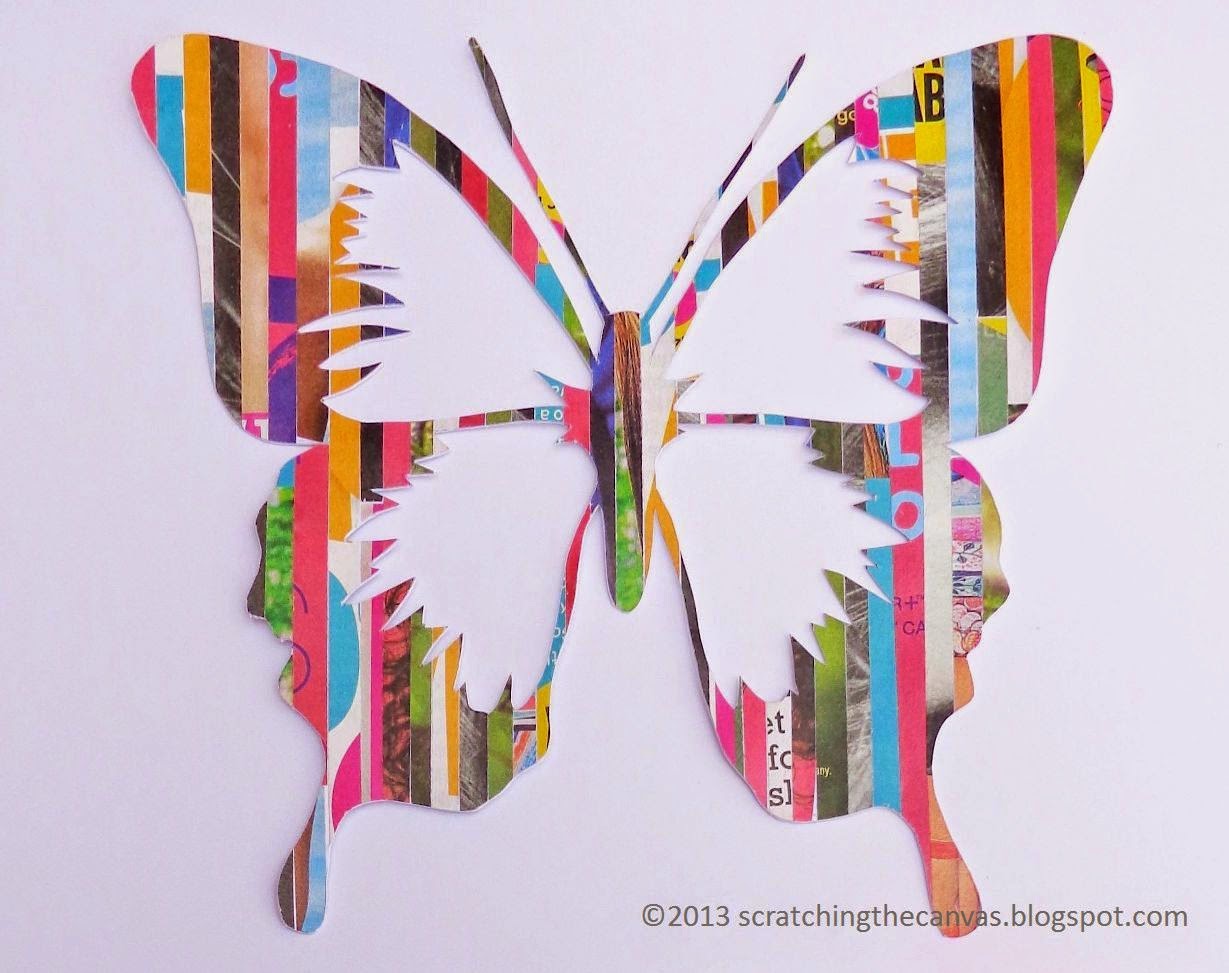
Magazine Art
One of the first things I did with my new-found free time was create a Pinterest board of projects I wanted to try out. One of the simplest and boldest trending ideas is making simple, bright silhouettes from colourful old magazines. The original post that I saw can be found here, at ilovedecoration.com.
I shredded my magazine strips and found some outlines to trace onto card, choosing a butterfly.

Instead of cutting my strips to fit the shape, I stuck them all over the reverse of the tracing, overlapping the pencil borders, and then cut my shape out with a craft scalpel afterwards.

Easy, and I might even find a use for the negative.
Instead of cutting my strips to fit the shape, I stuck them all over the reverse of the tracing, overlapping the pencil borders, and then cut my shape out with a craft scalpel afterwards.

Easy, and I might even find a use for the negative.

Subscribe to:
Posts (Atom)